
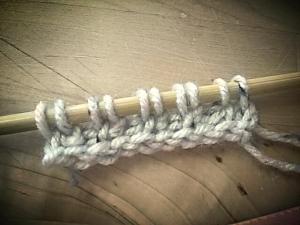
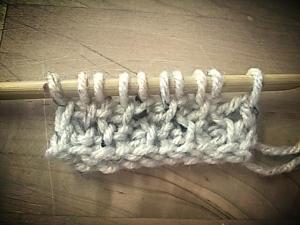
If you look through a lot of my patterns on Ravelry, you will see that I like to use the honeycomb stitch. When you combine offset rows of Tss and Tps, the resulting pattern looks like the cells in a honeycomb. It’s easy to do and I love the way it looks. Here are some other reasons why I love this stitch pattern:
- It helps to control the curl of the fabric. Most of the time, I try to use the curl in my patterns to my advantage but sometimes I just want the work to lie flat without a lot of blocking.
- In a slightly larger than normal gauge, it has great drape. Worsted weight yarn with a 6.0mm hook produces a fabric that isn’t stiff, but still has enough body for things like gloves or dishcloths. Worsted weight yarn with an 8.0mm hook has a gorgeous drape for scarves and blankets that work up quickly.
- The patterning helps to soften line transitions. A good many of us in crochet are addicted to self-striping yarns because they offer some gorgeous, luminous colour transitions that are all conveniently in one skein. Not all striped yarns are created equally, though. Some have rather harsh colour transitions and I don’t like that. If I am working with such a yarn, this stitch pattern is ideal for breaking up that crisp division.
- In yarns like Red Heart’s Unforgettable or Noro’s Kureyon, where the transitions are already fabulous, the softening effect takes a great self-striping yarn and turns the transitions into something that reminds me of wet in wet watercolour. I get a great big happy just thinking about it.
- It gives me something to focus on. Row after row of one stitch gets a little monotonous. Offset stitch patterns, where the rows are staggered like bricks, require a little more mindfulness.
The pattern:
Even number of stitches.
If you do not know how to do Tss or Tps, follow the links back to their tutorials.
Row 1: Tps, *Tss, Tps* rep across to last stitch, Tss in last stitch.
Row 2: *Tss, Tps* rep across to last stitch, Tss in last stitch.
Here is a short Instagram video, showing what it looks like when you do it:
Discover more from Tunisian Entrelac
Subscribe to get the latest posts sent to your email.
Hi, when you say you need an even number of stitches, is that at the start for the foundation chain?
So you might count 30 stitches and still tss into that second bar? Or you should have 31 stitches to begin with?
Thanks so much. Love this pattern!